
This article is presented to help the owner of a Porsche 356 understand the considerations for restoration of original floors in a 356. I have just completed the restoration of the floors on my 1965 C.
This was my third go-round with Porsche floors. Many years ago I first had floor work done for me on my 64 SC Coupe, and that time I paid a professional to weld in new floor panels. In that project we had the floors media blasted with walnut shells to remove the undercoating, and then discovered that the floors were not worth saving. Those floors were found to be inflicted with hereditary Swiss cheese disease (lots of holes). My second battle with Porsche floors was with my 68 Soft Window Targa, and in that case I saved/restored the original floors, beginning with stripping of the original undercoating with chemicals.
First off we must discuss several considerations for doing the work. Having now done three sets of floors, I can strongly recommend you consider all of the parameters discussed herein before diving into "restoring" your 356 floors.
One needs to do a little soul searching before entering into this project. First you need to determine the goal of the project. Is it to have solid floors? Rust free floors? Are you thinking of doing this yourself? If so, it that to save money? Are you trying to salvage the original floors to save money rather than have a professional replace the floors?
Here is a personal opinion. The reproduction floor sets are going to be stronger (and more rust free) than your original floors will ever be again. As we go through this article, you will see the beginning appearance of my original floors and what they looked like once the undercoating was removed. You need to understand that there IS rust on your floors. Don’t think so? I recommend that anyone considering salvaging his or her original floors begin by making the following inspection.
Remove your seats, remove the mats and take out the original horsehair pad and look at the floors from the top. In all the cars I have looked at, you will be looking at the worst side by looking from the top. Near where your feet rest when driving use a punch, screwdriver, or tool of your choice to scrape and poke around a bit. If you still think you have solid floors worth restoring, then continue reading, I haven’t scared you off yet.
The point of all the above is that if the goal of your project is to maintain a solid enough floor in your car, and save some cash by doing the work yourself, this could be the right project. If prolonging the life of the original floors is the goal, or you just want to keep original parts preserved as long as possible, this could also be the right project to undertake. But, if you really want “rust free” and the strongest construction possible, you most likely need to replace the floors with the reproduction stamped materials available today.
There are several methods for removing the undercoating. I have already mentioned media blasting, chemical stripping, and for this project I used an angle grinder and a twisted wire type wire brush. Others have had success with a heat gun and scraper. There are advantages and drawbacks with each method. Media blasting makes a big mess, and even if you have it done by a professional at his shop, you will be bringing a lot of debris home with you. It has a magic way of finding a home in every nook and cranny to hide in, only to bother you later. It will get inside the longitudinals if there are any holes, and the real danger is for it to find it’s way past your air filters and into your engine.
The point I am trying to make is that even though it will get you to bare metal in all the areas of concern, be careful and clean, clean, clean. For the chemical process, it can be done at home over a tarp in the garage. I have used a product called Citristrip from the local hardware store. It took several applications (four I think), leaving each coat on there for 24 hours at a time, but it eventually all came off. Advantage: almost no hard scrapping. Disadvantage is the mess of goo that is everywhere. If you are not careful, it’s easy to get a drop on your shirt and accidentally touch it to a painted surface on the car. I made that mistake last time and quickly found the problem and wiped it off successfully, but the issue is to containing the goo.
For this project, as mentioned, I selected the angle grinder and the twisted wire type wire brush. It is important to have the twisted wire type of wire wheel brush, and not the bristle type, because the bristle type are not be strong enough to remove the undercoating or rust. The advantage of this process was that this gets all the undercoating off in about 5 to 6 hours of work. I have a lift at home, so it is much easier than if you are just on jack stands.
However, caution here is that the undercoating will turn into a fine black powder, and it is best to treat that fine powder as if it contains cancer-causing components. You will need to dress up like a coal miner: eye protection, mask, and hearing protection are a must! When done, easiest to please the wife by throwing the clothes straight in the trash barrel. You’ll also use your Shop Vac a lot, and if you are like me, you’ll end up using the leaf blower across all your garage shelf items and then hose out the garage 3 or 4 times before it is all gone. It is simply a very messy job.
After setting your goals, the considerations are the workspace and the tools, and time to dedicate. Do you have an area where you can get the car safely high enough to perform the work? Can you get the area messy with all that debris and get it clean again? If so, the tools needed are very simple. I needed the angle grinder, a chisel and hammer, and my air compressor with a Schutz gun. I also used some tarps for when painting and some hand brushes and misc. sandpaper. The entire project, beginning to end was about 50 hours for me. This includes all the clean up time, breaks and miscellaneous time in the garage. Maybe I am slow, but I do have a hoist in the garage, so I would think some folks tackling this job in a less comfortable position could take longer.
Still not scared off? Well then, let's get started.
Photo 1
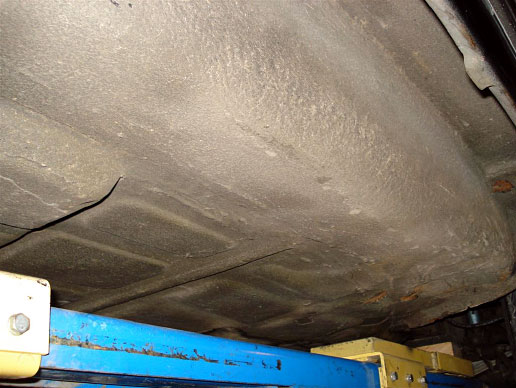
Photo 2

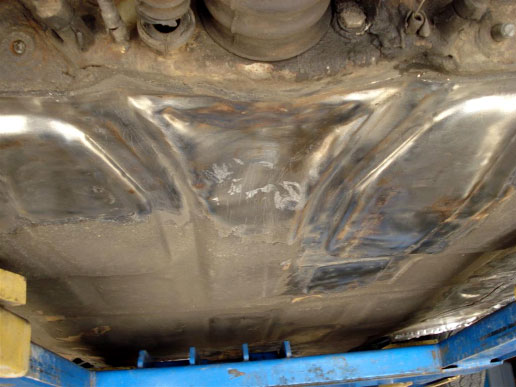
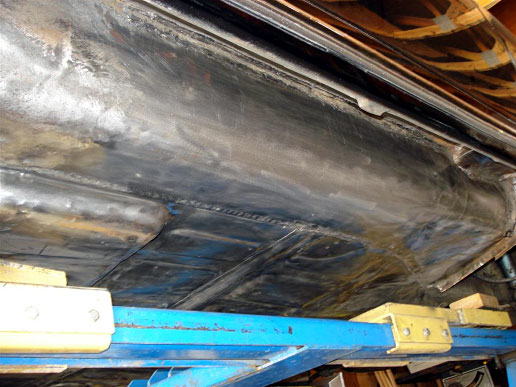
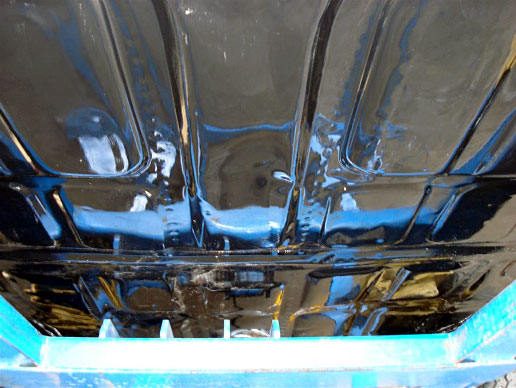
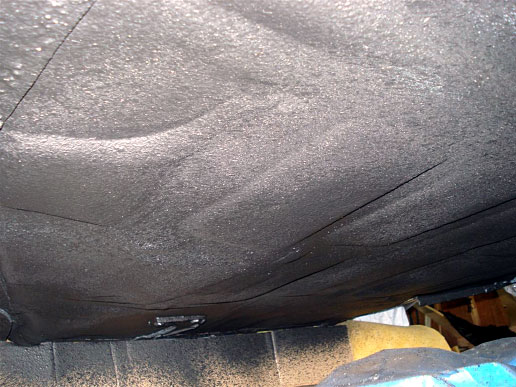
Pictures 1 & 2 are shots taken before I began the work. I can imagine that some 356 owners might look at floors in this condition and think the job of “restoring” the floors was not needed, or only needed patching. Maybe some might think that restoring floors that look like these photos would be for those concours guys only, just so it would look nice under there. Well, not so. These floors really needed the undercoating removed and restored. In some places it was cracking off in chunks. I could easily stick a small flat blade screwdriver at an edge of the cracking and flip off a chunk 1" square or more. When you do that with a screwdriver to these cars, you can see that the surface rust you thought you had in just a small "bald spot" actually has crept sideways, under the undercoating. Anyway, you can see the general appearance of the floors entering into the project was pretty good, and that the majority of the original undercoating looked solid, with some areas having the bald spots, and other areas looking like you could easily remove a chip of the covering.
Photos 3 - 6
Photos 3 - 6


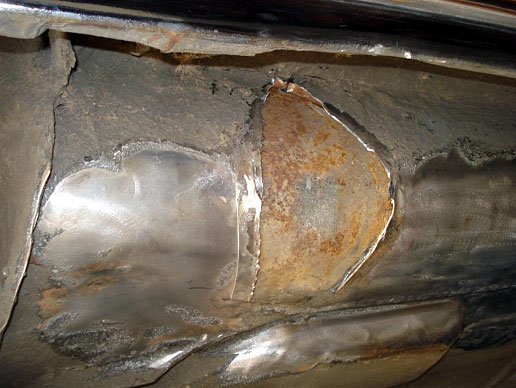
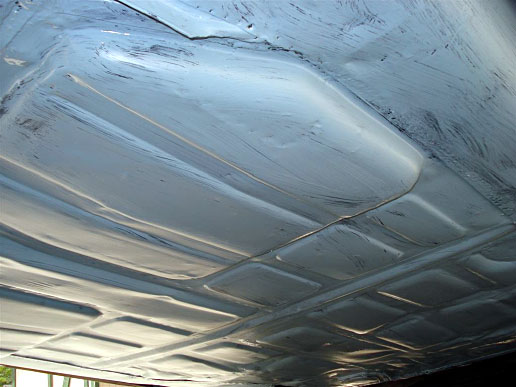
Pictures 3 – 6 show the beginning stages of the scraping with the angle drill and wire brush. Hopefully you can see in Photo 3 a section of undercoating that had separated away from the floor but not yet fallen off. This shows that the adhesion to the floor behind it had lost integrity, and normally that is due to the presence of some rust. You can also see in the pictures the various dents in the floors. Getting under there and seeing all the flaws in the metal work made me feel like the 356 had been driving over golf balls for 40+ years. Happily, most of the dents were repaired in the course of this project. Note in Photo 6 that the rust was starting to form at the seams. Rust "seems" to like seams. Before it was exposed, the area in Photo 6 looked like it was well covered/protected by the original undercoating.
Photos 7,8,9

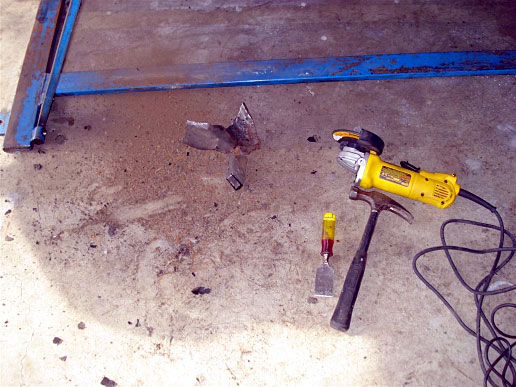
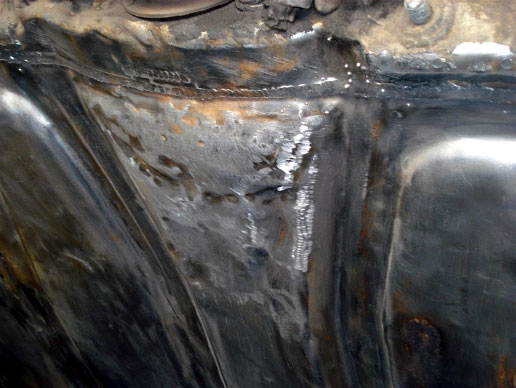
Pictures 7, 8 & 9 show the work around the jack spurs. Mine were rusted through on the spurs, as shown in picture 7. I used my angle grinder to cut as much metal away as I could, and then finished where I could not reach with the grinder by using my hammer and a chisel. When pounding with the hammer, dust and dirt was flying out. When I got the jack spur to the ground, I took picture 8 which shows it was packed with dirt between the spur and the longitudinal. This is not a good thing. Get that a little wet, and you have a rust potion at work. As you can see in photo 9, it was attacking the longitudinal, but it was still structurally strong. I was lucky, and after working on the spot pretty hard, you can see the improvement in Photo 10. When going after the last pores of rust, I found heavy grit sandpaper helpful. Sandpaper or a Scotch Brite pad is a good last step before using the cleaning and metal prep chemicals.
Photo 10 - 12
Photo 10 - 12
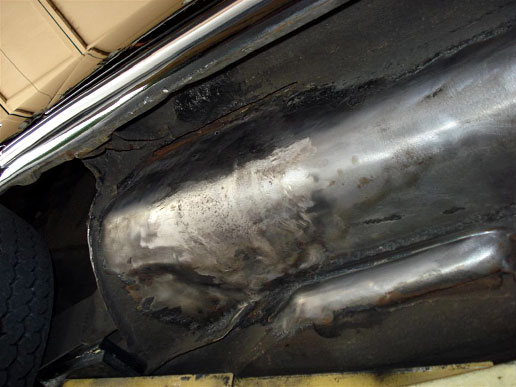
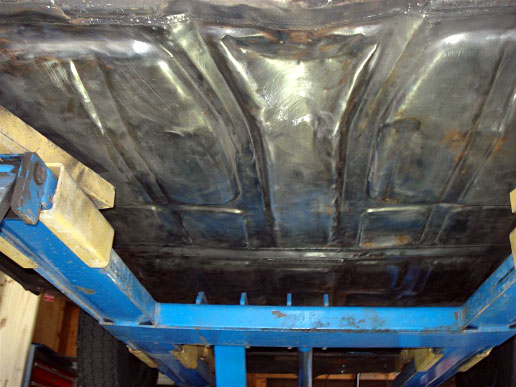
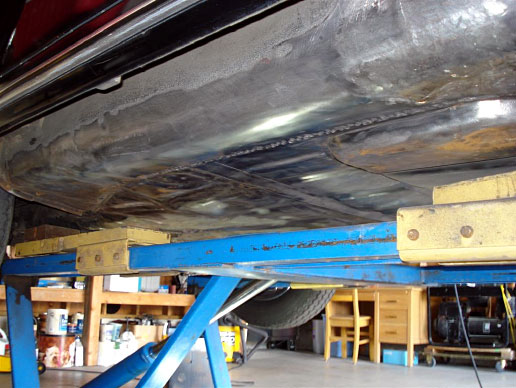
Photo 12 shows the area where the drivers side jack spur was removed. It was identical to the conditions found on the passenger side. Photo 11 shows a shot that I was happy to take- all undercoating off the bottom side! Note a few things in this photo. One, I was again lucky, as these original floors, although lumpy, are not rusty and don’t look like Swiss cheese. They had light rust beginning to form, but it was removed in the project and the metal chemically treated (we will get to that later). Also note the huge dent that is at the rear of the tunnel. Almost like the car was driven over a log or off a curb. No ex-wives jokes please.
At this point in the project, I expanded my work scope. I decided that since I was under there anyway, I might as well do the bottom side of the door sills. While mine were in good shape, it gave me a nice point of demarcation between what areas would receive new undercoating, and what would be left alone. I removed all the undercoating from the bottom of the door sills and left the back side of the rocker panels alone. That later became my tape line for all the new floor covering(s) that I applied. A tip here: I used Sears pry bars, with the tips sharpened, to reach up there and scrape the undercoating off of the sill bottoms. It was easy using this technique, and each side took only about 15 minutes.
Photos 13 - 16

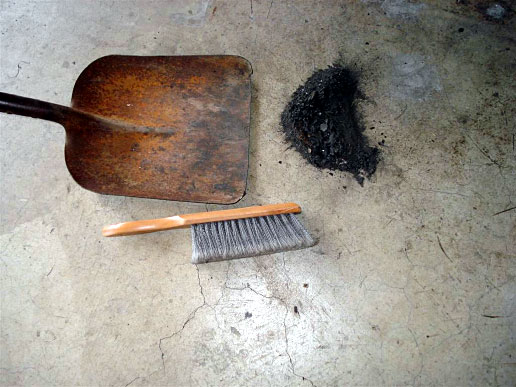

Notes that are important in Photos 13 – 16: Notice that I unfolded the seam at the back side, bottom of the front wheel wells. It was rusty in there, (most are) so I’m really glad I opened it up to remove the rust. After cleaning up that area thoroughly, and treating for rust, I then folded it back and applied seam sealer to keep moisture away. Also, the reason for the dust pan and broom shot is to let you know that is the undercoating removed from ONE door sill only. Wanted to give the reader some way of understanding just how much of the debris there is. I found it best to work an area, stop to take a break, and clean up before moving on.
Photo 17
Photo 17
The project at this point is free and clear of any undercoating on both the top and bottom side of the floors, and the bottom side (only) of the door sills and longitudinals. The ragged old clothes are tossed out, the garage is clean again, and time to move forward. I then worked on removing the dents on the floors. Small dents were a breeze, but the smashed area at the rear of the tunnel presented a challenge. I worked around the shift rod using various pieces of wood, including a shortened broom handle. Took me about an hour to get it to the condition shown in Photo 17. Pretty good improvement from what it did look like.
I suppose if this was a concours effort one could use a dent puller and make the entire area perfect, and you could also address the longitudinals as well. But for my car, I addressed only the areas I could reach with standard garage tools that I had. Note: It does not mean that the floor has to remain that way forever. Should I choose to go back and address the dents in the longitudinals at a later time with a dent puller, it would be a fairly simple re application of the Wurth undercoating. Likely not a big project to come back to, but if you have the tools and the time to remove the dents in there now, this is the best opportunity to get rid of them.
For the areas that I could not reach with one arm inside the car and with the hammer and one arm below the car with a block, I solved that little problem with a bottle jack and blocks of wood. This is not like working on the exterior of the car, as the Wurth undercoating will smooth out a lot of the little scars, so no need to be absolutely perfect.
It is necessary at this time to point out the products I chose to use when restoring the floors. Since when restoring the floors, we are talking about keeping old metal that does have some rust particles (even if minimized and well treated chemically) I chose to cover the bare metal with POR 15. I don’t want to sound like I am promoting their product, Eastwood and others carry good products as well. The main point is that I selected a product meant to go over rust, even though I may have removed and neutralized 99% of it. These are not new metal replacement pans, they are the original stuff. Conversely, if the pans were cut out and replaced, I would not have selected POR 15, but would have gone with etching the new metal, and a good primer.
Anyway, I chose POR 15 and because I wanted zero excuses for things not to bond/stick together well, the decision was made to use the entire line of products from them. This means I cleaned the bare metal with POR Marine Cleaner, then prepped the metal (which included “neutralizing” the rust and applying a zinc primer) with POR Metal Ready. Over the Metal Ready I applied the POR 15, and then over the POR 15 I had to apply POR Tie Coat Primer so that I could then apply the Wurth Underbody coat. The other product I bought for the project was new jack spurs, supplied to me by Restoration Design.
Photo 18 shows the top side of the floors after using the Marine Clean and applying the Metal Ready to the drivers side.
Photos 18 & 19
Photos 18 & 19
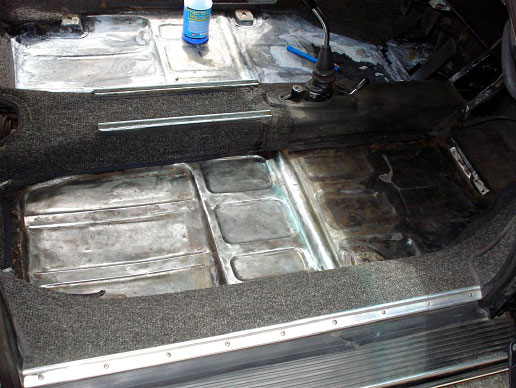

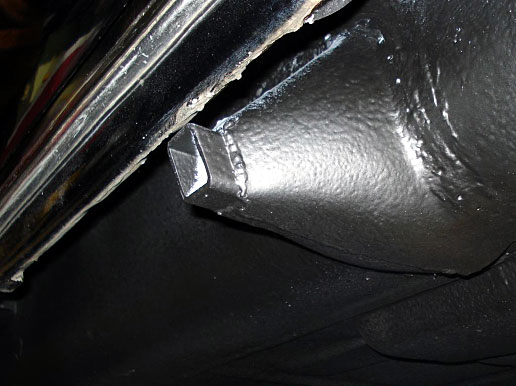
Photo 19 depicts the new jack spurs, which fit quite well. It is important when welding on the jack spurs that the flange mate exactly flush with the longitudinal. If you cannot accomplish this, the original spot weld technique will not integrate well enough to be strong. As a backup you can put a small bead of weld along the sides to add strength and if you keep it small and then cover with seam sealer and the Wurth, it cannot be seen.
A TIG welder was used to install them on this project. We all know to never use a jack spur to lift the car but best to make it strong in case someone else pulls out your nicely restored Bilstein jack and attempts to lift the car. Also in photo 19 you can see the holes drilled for the individual welds. I found the flange area very easy to form to the shape of the longitudinal by first drilling the holes and then using channel lock pliers to mold the flange.
Photo 20 & 21
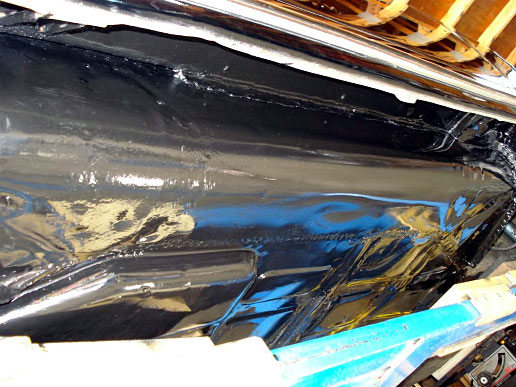
After prepping the metal properly, I applied the POR 15 as shown in Photo 20 and 21. The surface is shinny and pretty, but too slippery to apply the Wurth undercoating over. That is the purpose of putting the POR Tie Coat Primer (Photo 22) over the POR 15. It can be sprayed on, but in this project I simply used a brush. It gives the Wurth product a good surface to bond to.
Photos 22 & 23
Photos 22 & 23
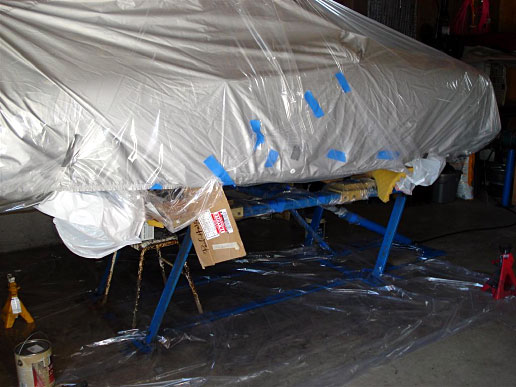
sIn preparation for spraying on the Wurth, I chose to turn my 356 into a cocoon. It states on the Wurth can that there is very little overspray and that it will come of easy with gasoline if there is any. Not wanting to give my car a rubdown in gas, I prepared it as shown in Photo 23. I also found that a large section of foam helped me to keep overspray from the areas fore and aft of the floors. I also masked off the backside of the rockers, making my line between the door sill bottom and the rocker inside wall.
Photo 24 - 28
Photo 24 - 28


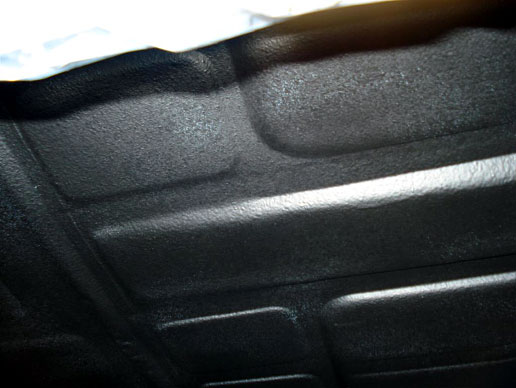
The remaining Photos, 24 - 28 show the results after spraying the Wurth onto the car. I used a Schutz gun that cost me about $30 and my compressor set at 75 PSI. I am satisfied that the appearance of the blotches closely resembles the original undercoating appearance. Note that the color of the primer was a light gray-blue color, which actually made it easy for me to see where I needed to apply a bit more undercoating.
To maintain this appearance, it has been recommended to me by a well known restorer of concours level cars that one can simply take a brush and paint on Rustoleum satin or Rustoleum flat black paint. They will both fade over time, and he recommended that they closely resemble the original appearance. I chose to apply satin black, simply to help me keep it clean under there in the future and to cover up any small areas where the lighter colored primer was showing through.
If you chose to undertake all this work, you will be among those of us who have undertaken it and survived a tough project. Not technically tough, just physically challenging to remove the undercoating and clean up the mess. It becomes quite manageable after that.
I hope your original floors are pristine and free of rust, and if not, perhaps this article can help you restore them to a level that will keep them strong for years to come.