
|
The chrome shop I have been using has been doing a very good job. I can recommend them to others based on their prices and quality of work. The shop is Art's Brass, located in Seattle. That being said, we struggled to get the little dash plate done with an appearance as originally appeared on the 356 B and C cars. They issue is the strip that runs East/West on the plate that is NOT supposed to be bright shinny chrome. It is chromed but the finish is to be a matt finish. This is difficult to do because the rest of the plate is like all the other chrome- bright, smooth, and highly reflective. It took 4 attempts, but they kept working with me, and it is finally right! It arrived here by UPS last night and I just had to share a photo. Click on "previous" at bottom left for more chrome shots...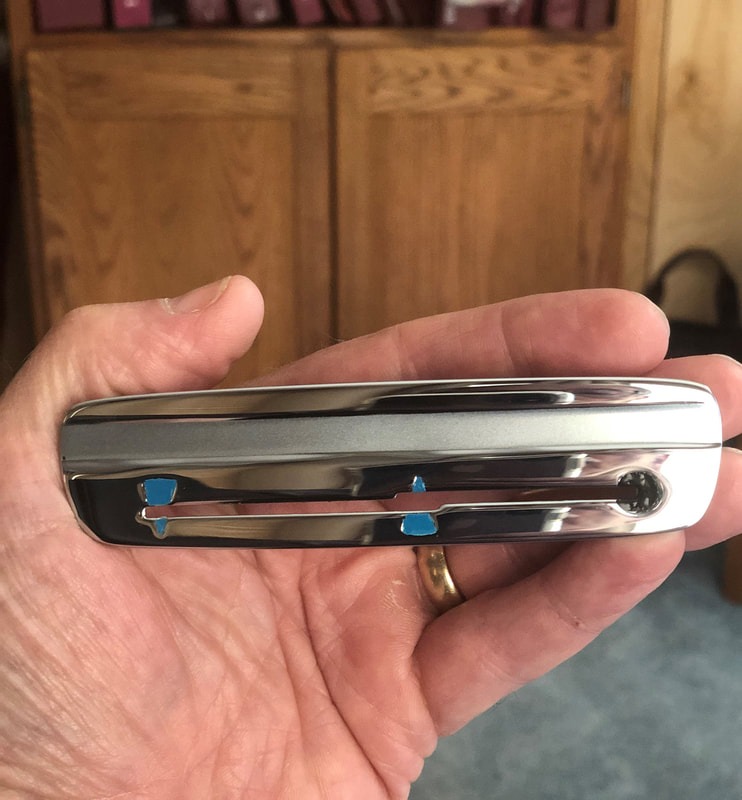
1 Comment
A full restoration of the 1/4 windows is a very time consuming, and somewhat expensive task. The chrome work is expensive, but after that you still have to buy the rubber that holds the glass to the frame, the rubber that goes around the outside of the frame, and then the rubber that attaches to the car body. Not cheap. When doing an assembly of the parts, many have commented over the years that you need a fixture or 4 hands. All true, because after you place the rubber on the glass and attempt to slide it into the frame, the rubber is busy sliding off. I use liquid soap as a lubricant, which works well, and was fortunate to get them assembled on about the 4th try on each side- no fixture and no other hands. It is important to make sure that the straight vertical chrome piece goes back to the side from which it came, otherwise you might not get nice tightly mitered corners. I have included a photo of one of mine. Also of note, is that the chrome will have built up on the surfaces, despite the best efforts of the chrome shop. Openings & mating surfaces may need light filing- mine did. All of this takes plenty of time and patience. During the assembly, I lost one of the tiny screws that holds the knob to the latch assembly. They are magnetic, but I gave up after about 45 minutes. Consider little things like this if you tackle the job. I still have the rubber to frame piece to fit, and the rubber to body as well, but while those are tricky (like cutting around the hinge), they are more time consuming than difficult. I also decided to use my original glass. It has slight bubbling at the edges that can be seen in you look carefully, but hey, Miss April deserves some patina. Overall I am happy with the progress. These take way more time than installing a windshield! 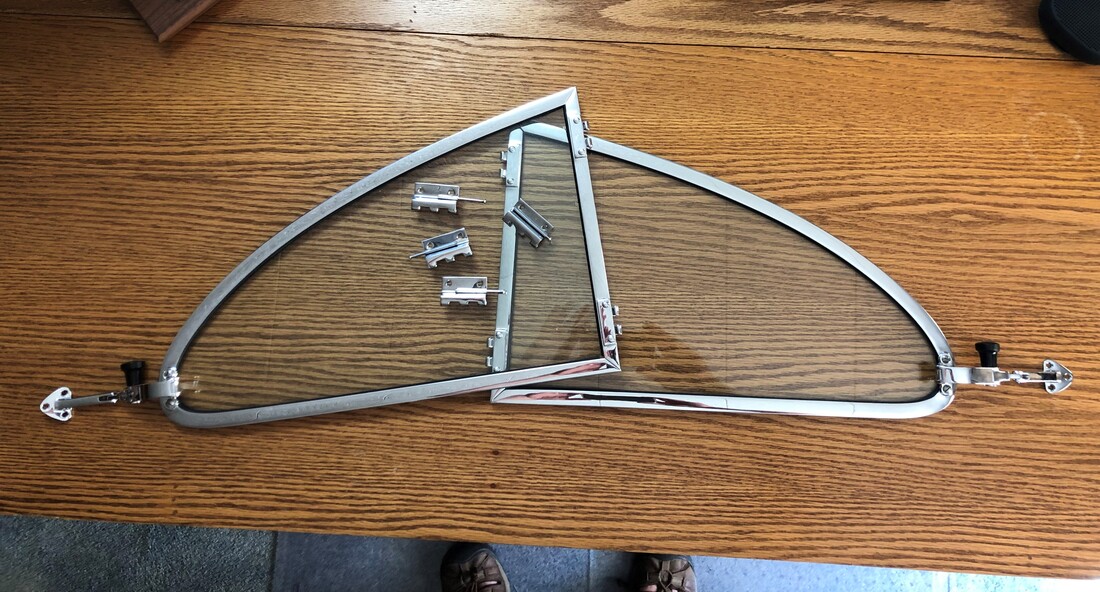 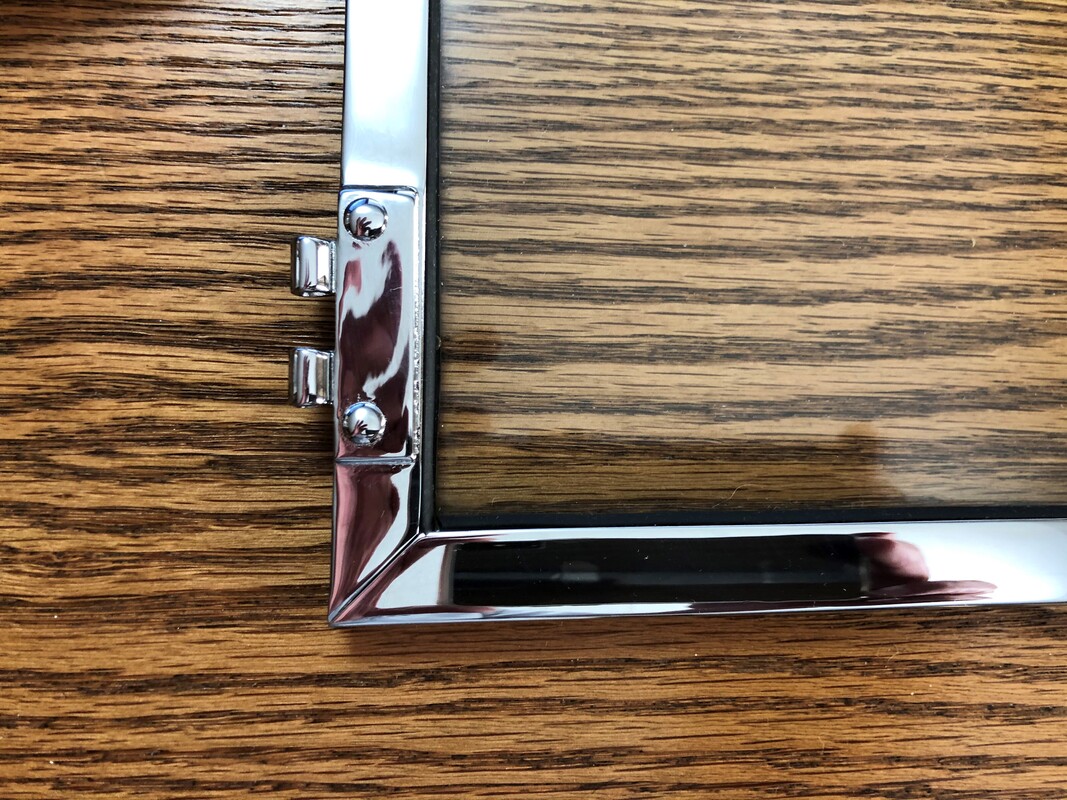 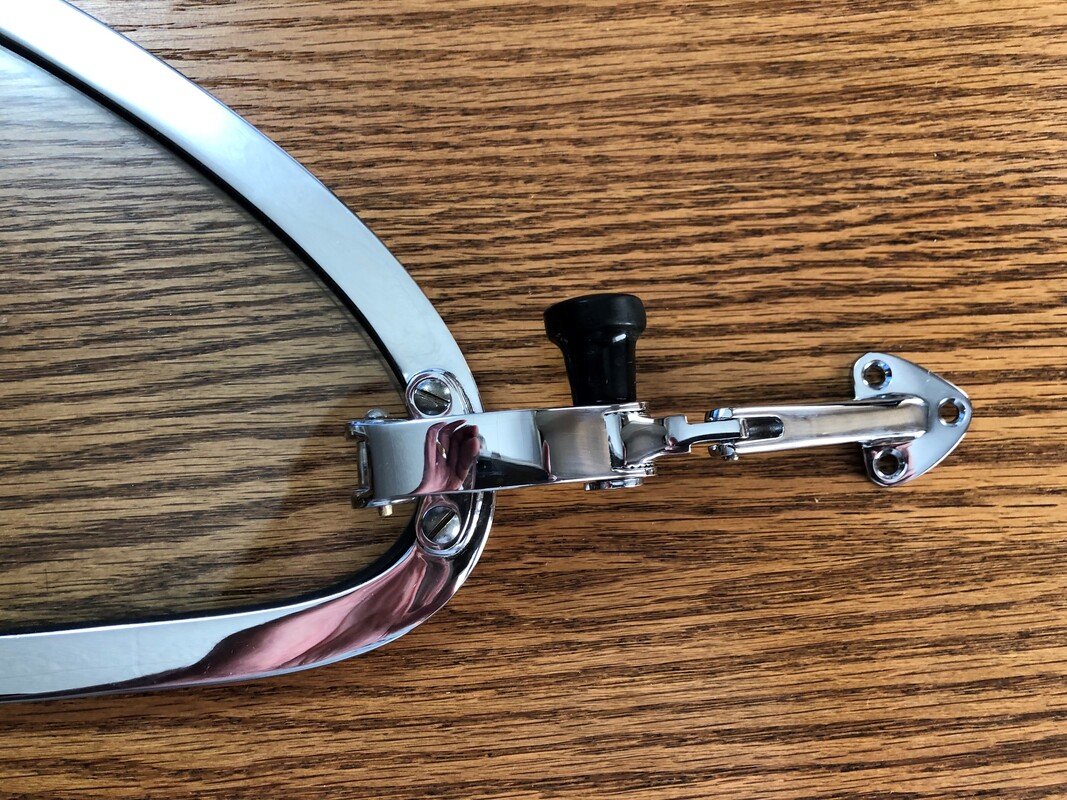 There has been some dialog recently on the 356 Registry regarding the replacement of generator brushes. This is a common wear part, and eventually, if you drive your car, you'll need to replace the brushes. Question is- With what? Years ago i toasted my voltage regulator and I sent it along with my generator to the electrical guru, Joe Leoni to restore them. I also had the pleasure of visiting Joe at his home in Colorado for a brief visit during that time. So, the advice below is from Joe and I am just the conduit for the message. Always use NOS when you can. All replacement parts are not created equal. Generator brushes can be incorrect in length, because they were made for different generators/applications. The most notable of the other applications is VW, but there were others as well. This means that you cannot just see a pair of brushes on E-Bay and double click and all will be ok. If they are too short, they quickly will not do the job. To long, and you can break the spring or not even be able to install the brush. PORSCHE had a part number for the brush, but it is not the same part number as the BOSCH part number. Joe (and now I) happen to have the BOSCH part number catalog, and the correct BOSCH part number is shown in the photos below. The photo is an NOS pair I bought a while back to have as spares for my car. Hope this helps others in their search. You could buy replacements by looking at the standard vendors and using the PORSCHE part number, but remember, not all replacement parts are created equal. Hope this helps. 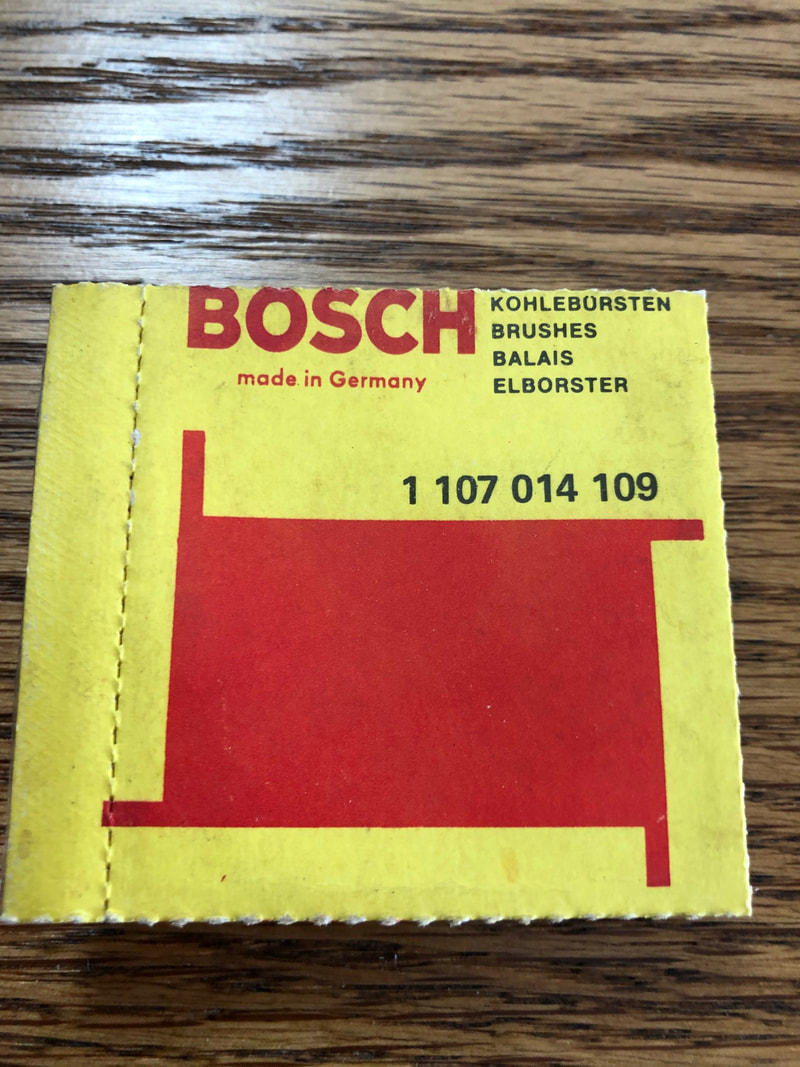  Fun weekend coming up for Dads. Hopefully they (we) get to spend some quality family time. Once in a while, some of us even get a small gift to celebrate. Heck, maybe back in the day one could open up the glove box and grab a couple of pamphlets out and read about things that PORSCHE could provide for Dads favorite car. Yes, a look through the Accessories booklet would tell you the options for buying the PORSCHE supplied accessories when buying the car new. Then there is the accompanying booklet with prices. Granted, this is all for when buying the car, but it would give anyone thinking of a Father's Day gift some good ideas. I'm happy to have these documents in such nice shape. Have a great weekend. 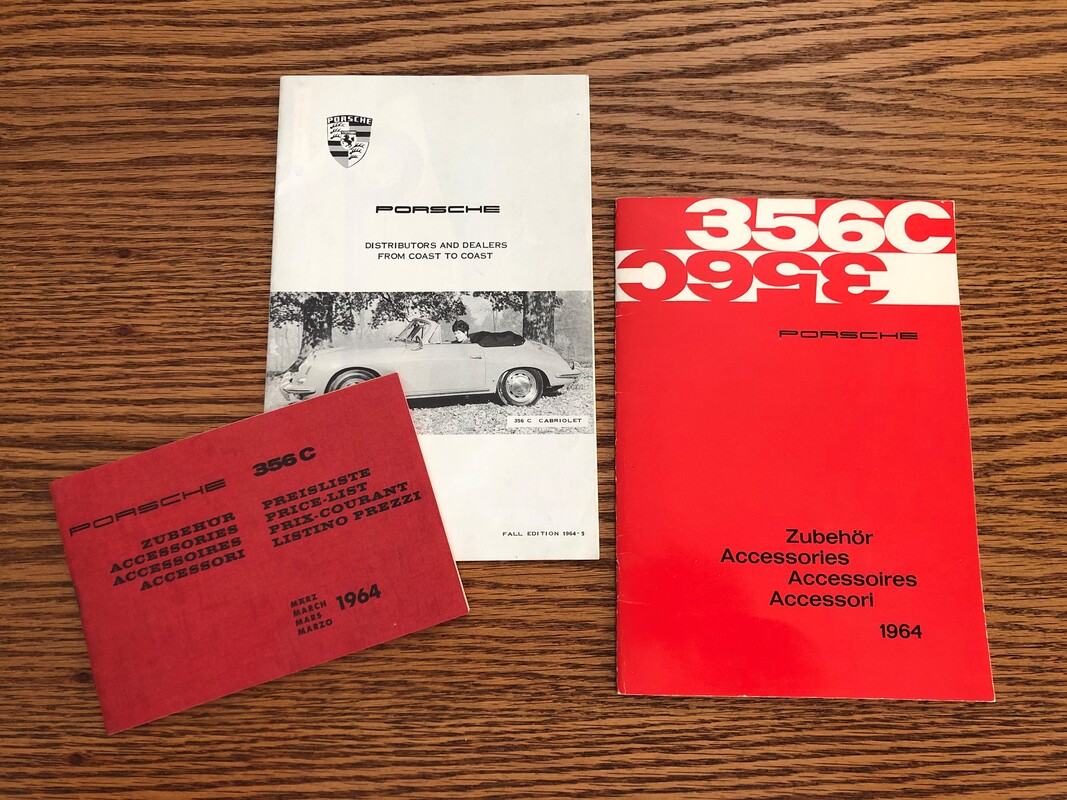 Once the gas tank is installed (soon), installation of the refurbished gauges will be high on the list. I took plenty of photos of the wiring, but I will also rely on the fantastic work of Greg Bryan. Everyone should have one of his diagrams for their car. Great work! Contact him through the Registry. Click on the diagram for a larger view. 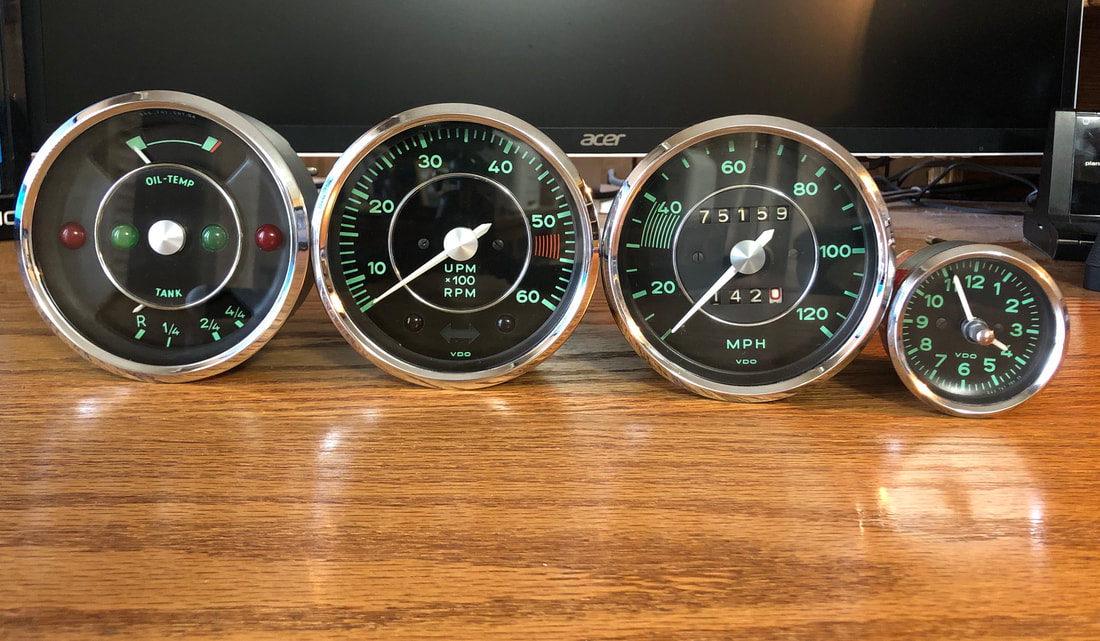 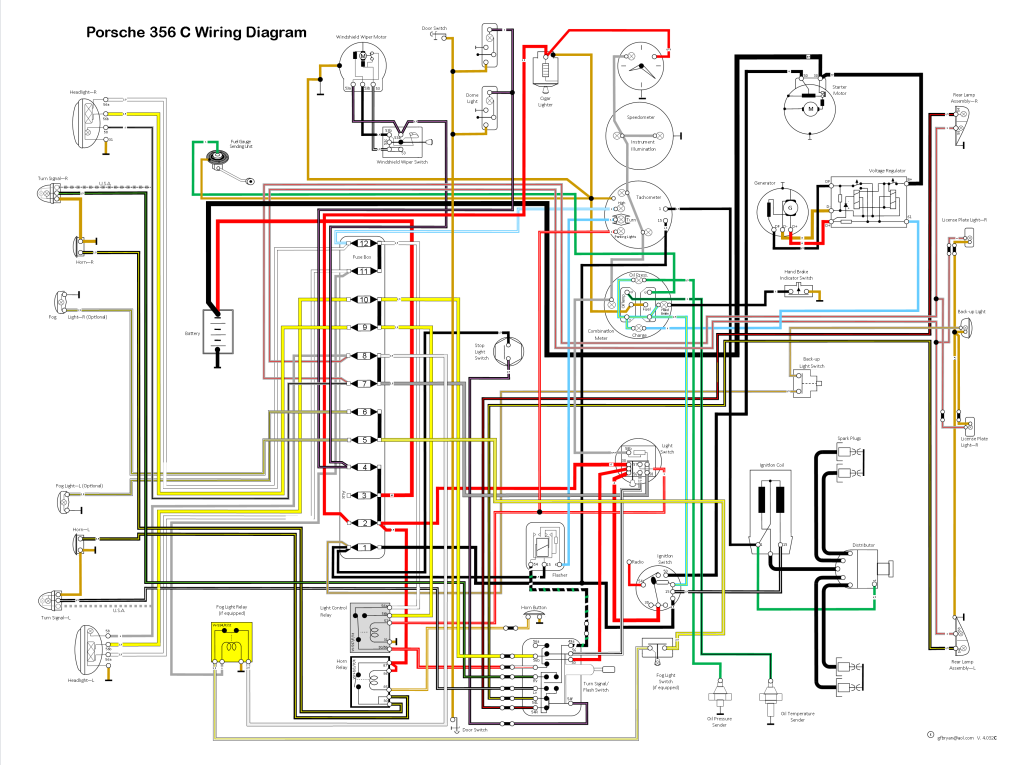 I sent out my gas tank to have it boiled out and sealed. On my last 356 I did this myself, and frankly it's just a nasty and time consuming job. This time I sent it to a radiator shop, they did the cleaning and installed a nice coating of Red Kote to seal it all up and prevent rusting. My task, now that I picked it up yesterday, is to complete the outside of the tank. Lots of steps here:
 |